Showing posts with label Diabetic Recipes. Show all posts

Thursday, September 9, 2021

Summer Tomato & Zucchini Quinoa Pizza

               Summer Tomato & Zucchini Quinoa Pizza

This summery Tomato Zucchini Quinoa Pizza is a simple, flavorful, plant-based pizza recipe that makes a wonderful meal or appetizer! And thank you to Sabra for sponsoring today's post!

Tomato & Zucchini Quinoa Pizza -- a simple, flavorful, plant-based pizza recipe that is absolutely PERFECT for summer!

I've been on this insane pizza kick lately. I can't explain it, but I literally crave it all the time. Whenever I think about dinner, pizza is the first thing that pops into my head.

Luckily, if we ❤️ pizza AND like eating healthy, there are options. Not all pizza is filled with gluten, cheese, and grease.

We can make pizza out of cauliflower, we can make it out of sweet potatoes (you gotta try these Sweet Potato Pizza Bites!), and we can even make it out of quinoa!

How to make quinoa pizza crust in your blender!If you're new the site and haven't dug into the archives, then you might not have seen my 5-ingredient quinoa pizza crust recipe, but it's far away from the most popular recipe on the entire site.

But like, I totally get it. Healthy pizza. 5 ingredients. Minimal clean-up. It doesn't get much easier!

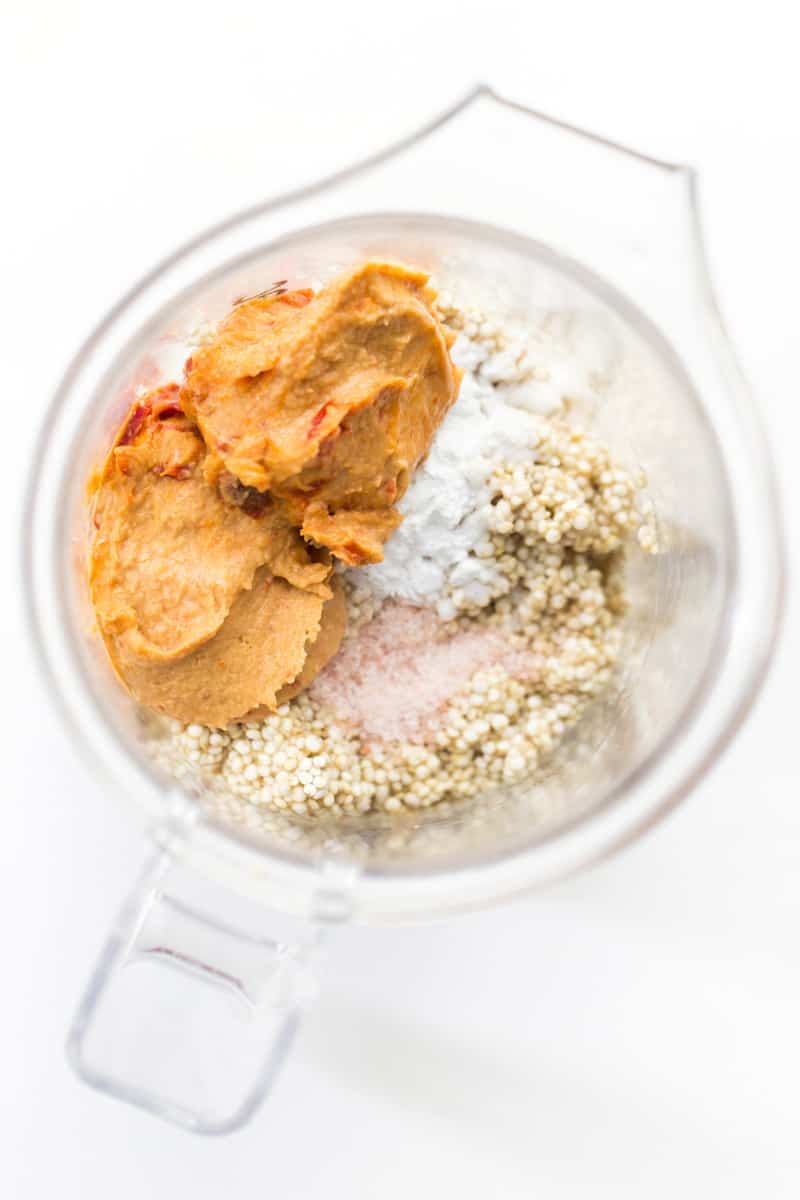
Today I'm going to show you how to make my traditional quinoa pizza crust with a little twist. We're still using the soaked quinoa, but swapping out the olive oil and some of the water for…hummus!

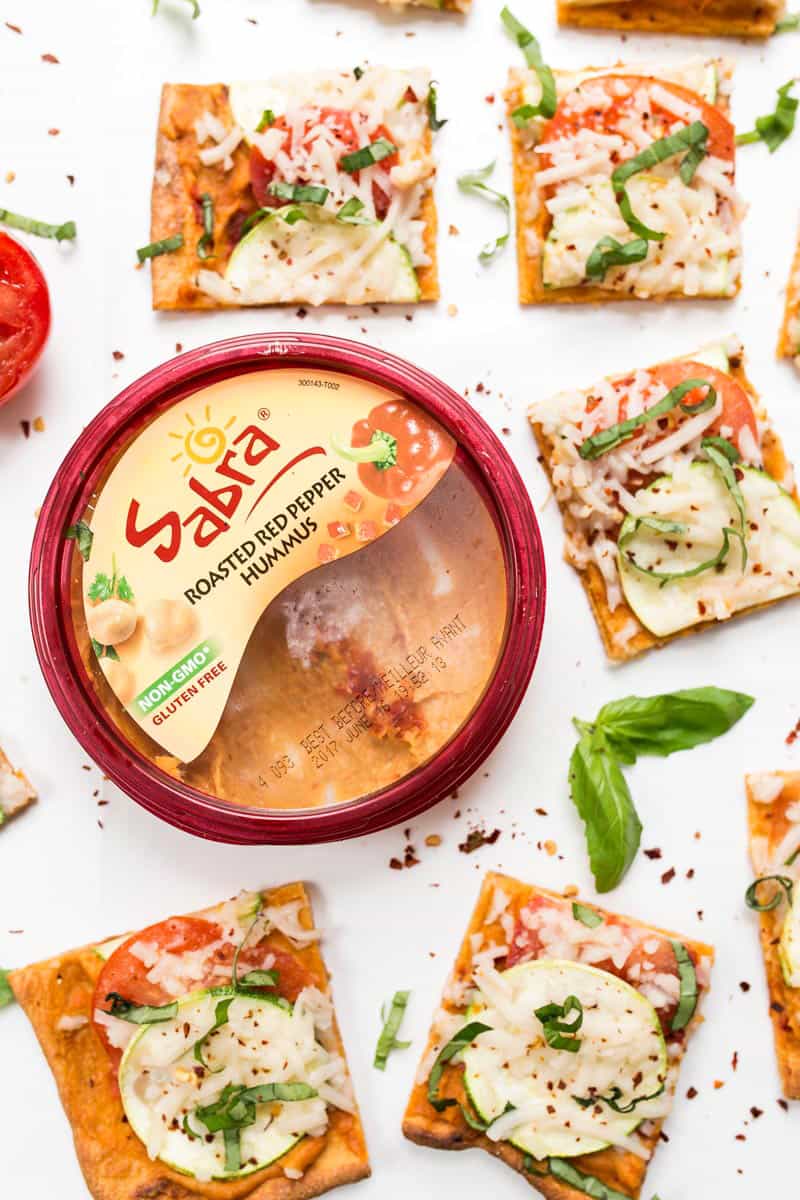
Roasted red pepper hummus to be exact!

Summery Quinoa Pizza topped with hummus, tomato and zucchini! It's simple, light and SO flavorful!

Summery Quinoa Pizza topped with hummus, tomato and zucchini! It's simple, light and SO flavorful!My go-to hummus brand is Sabra, you guys know that by now, and their roasted red pepper flavor is actually insane. It's got their signature creamy texture, the perfect balance of tahini and garlic, with just the right amount of roasted red peppers. And you get that incredible flavor with every bite!

I'm using it two ways with this summery quinoa pizza. First, we're using it in the crust to mellow out the quinoa flavor, while also increasing the protein content of the meal. Second, we're using the rest of the hummus as our base. So rather than slathering up on tomato sauce (or pesto), we're using the creamy roasted red pepper hummus and it's damn good!

Summery Quinoa Pizza topped with hummus, tomato and zucchini! It's simple, light and SO flavorful!

I will say though, if roasted red pepper ain't your thing, no big deal. Sabra has tons of flavors to choose from and many of them would work. I'd suggest trying…

  • Basil Pesto
  • Spinach & Artichoke
  • Roasted Garlic
  • or Sun Dried Tomato

Okay… now, I'm getting hungry again. Trying all of those combos next time I want pizza!

Tomato & Zucchini Quinoa Pizza -- a simple, flavorful, plant-based pizza recipe that is absolutely PERFECT for summer!

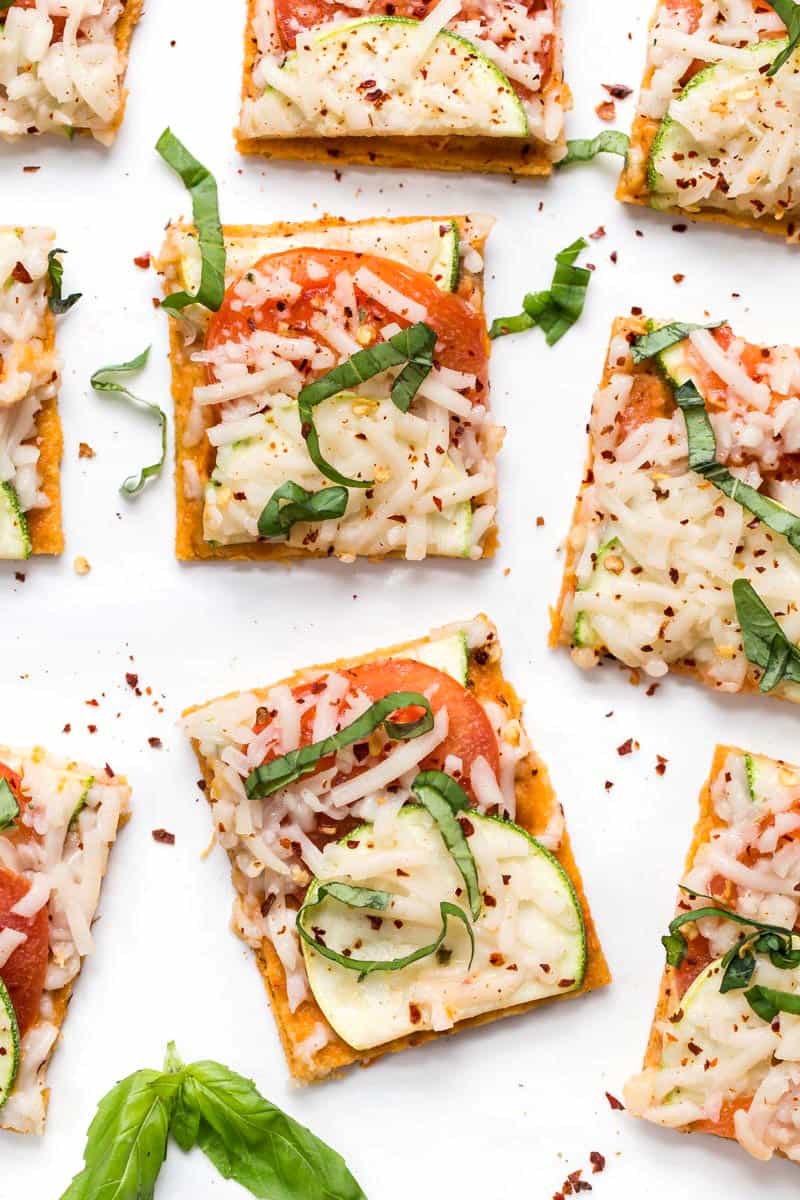
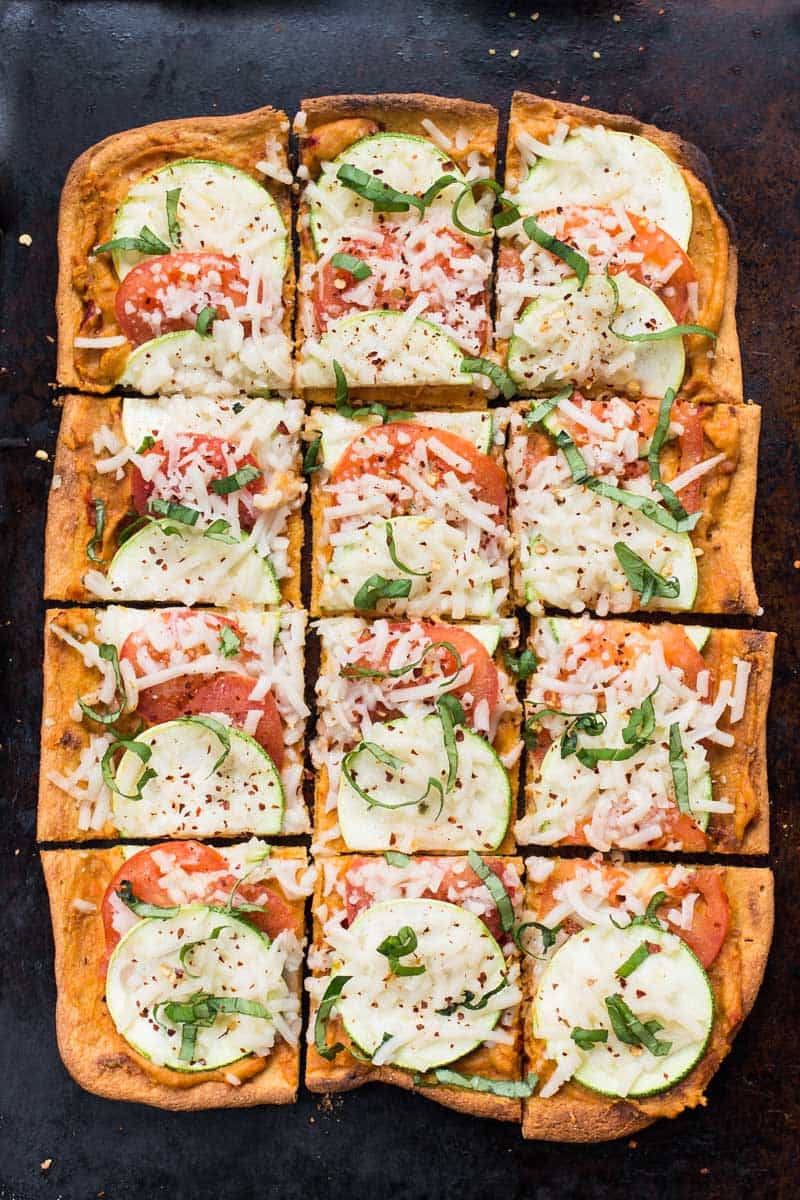
For toppings, we kept it simple and summery. Freshly sliced tomato and thinly cut zucchini layered across the top and sprinkled with vegan cheese.

While I'm totally game for topping your pizza with ALL the things, sometimes simple is better. And in this case, that's 1000% the case!

Tomato & Zucchini Quinoa Pizza -- a simple, flavorful, plant-based pizza recipe that is absolutely PERFECT for summer!

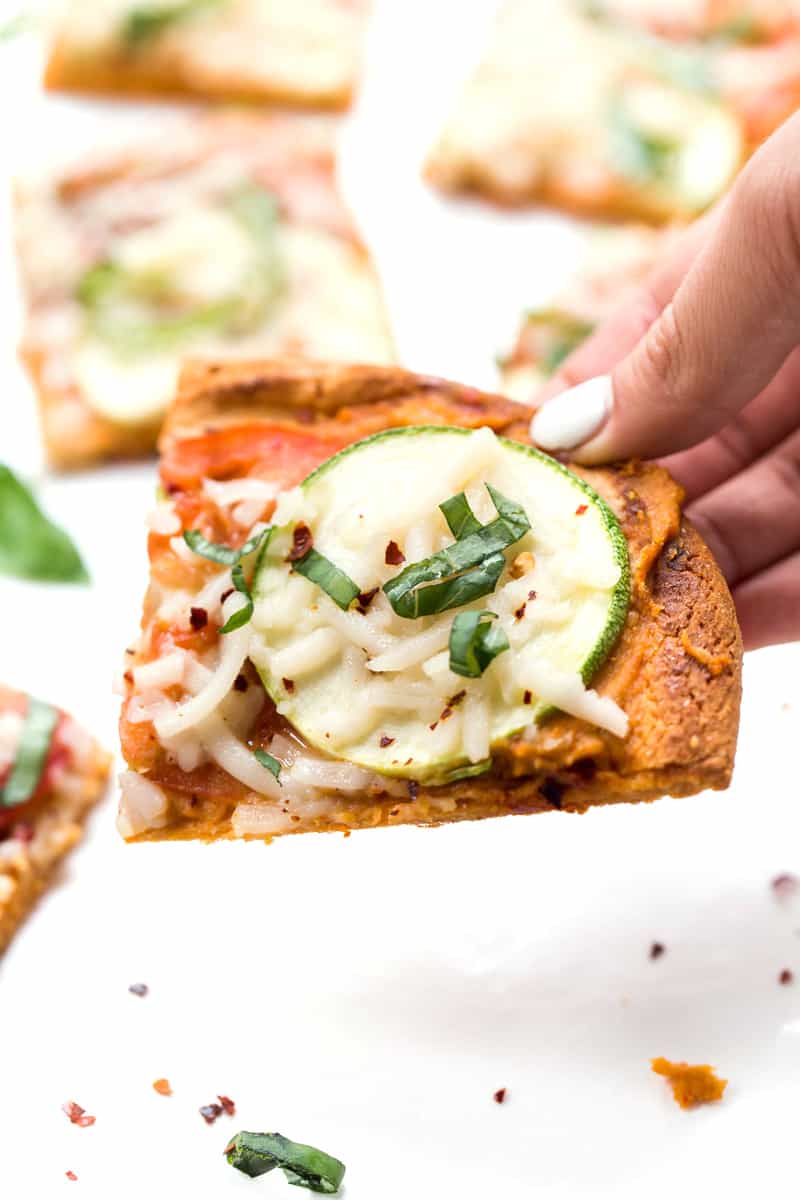
What's great about this quinoa pizza recipe is that you can serve it in a variety of ways. Not only does it make an awesome weeknight meal, but it's also great for entertaining.

Throwing a party with your girlfriends? Backyard BBQ? Honestly, who wouldn't LOVE to go to a party and seeing a platter of healthy pizza? Umm… me please!

Ingredients

  • 3/4 cup white quinoa soaked in 3 cups water
  • 1 10 oz container Sabra Roasted Red Pepper Hummus, divided
  • 2 tablespoons water
  • 1 teaspoon baking powder
  • 1/2 teaspoon sea salt
  • 1 small zucchini
  • 2 to matoes
  • 1 cup shredded vegan cheese or regular cheese
  • Finely chopped basil & roasted red pepper flakes to garnish

Instructions

  • Soak quinoa in warm water for at least two hours, preferably overnight. 
  • When ready to make, preheat the oven to 425ºF and line a baking sheet with parchment paper.
  • Drain and rinse the quinoa in a fine mesh sieve, then add it to a blender along with 1/4 cup hummus, 2 tablespoons water, baking powder and sea salt. Blend on high until smooth and a thick batter forms.
  • Pour the batter onto the parchment-lined baking sheet and spread it out into a rectangle with a spatula. You want the crust to be about 1/4 - 1/8" thick.
  • Bake on the center rack for 10 minutes, then remove and flip the crust directly onto the baking sheet and bake another 8 minutes.
  • While the crust is baking, finely slice the zucchini and tomatoes into rounds.
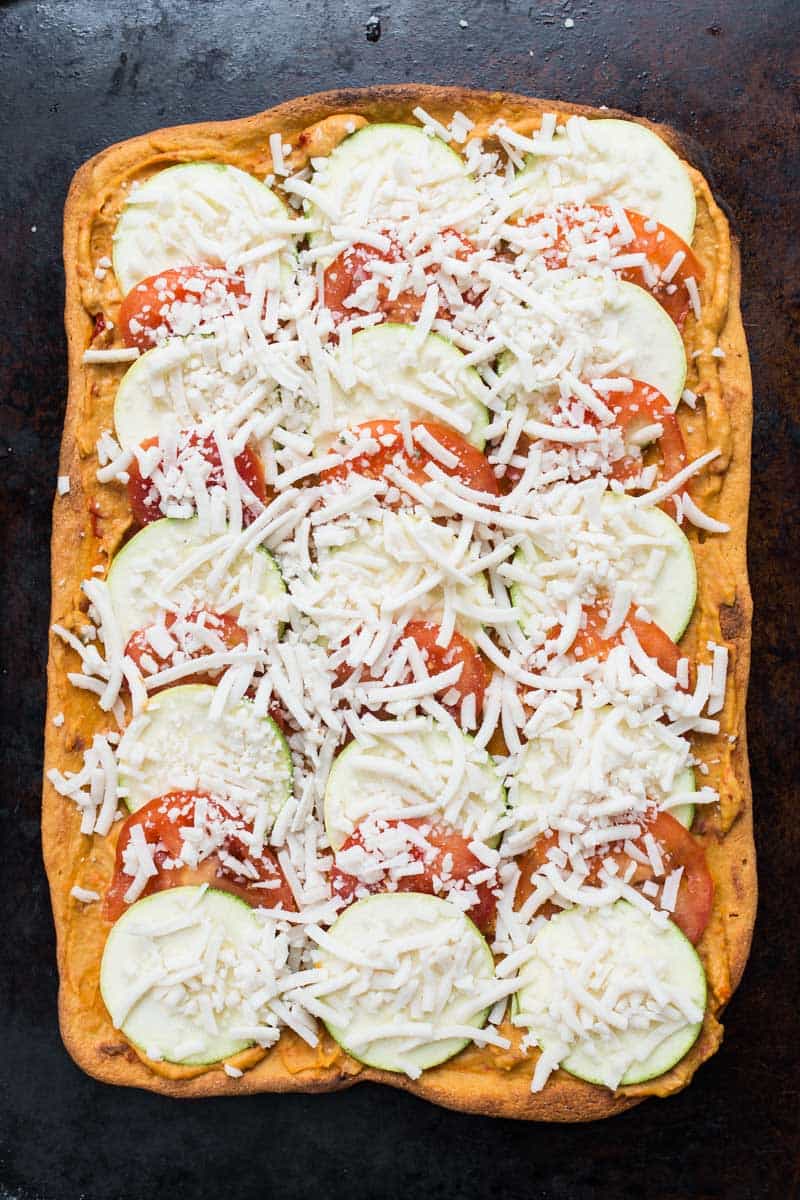
  • Remove the crust from the oven and spread the rest of the hummus out in an even layer (this acts as our "sauce"). Top with the zucchini and tomato slices (I arranged them in rows, but you can do it however you like), followed by the cheese.
  • Bake for another 6 - 10 minutes until the cheese has melted and vegetables are hot.
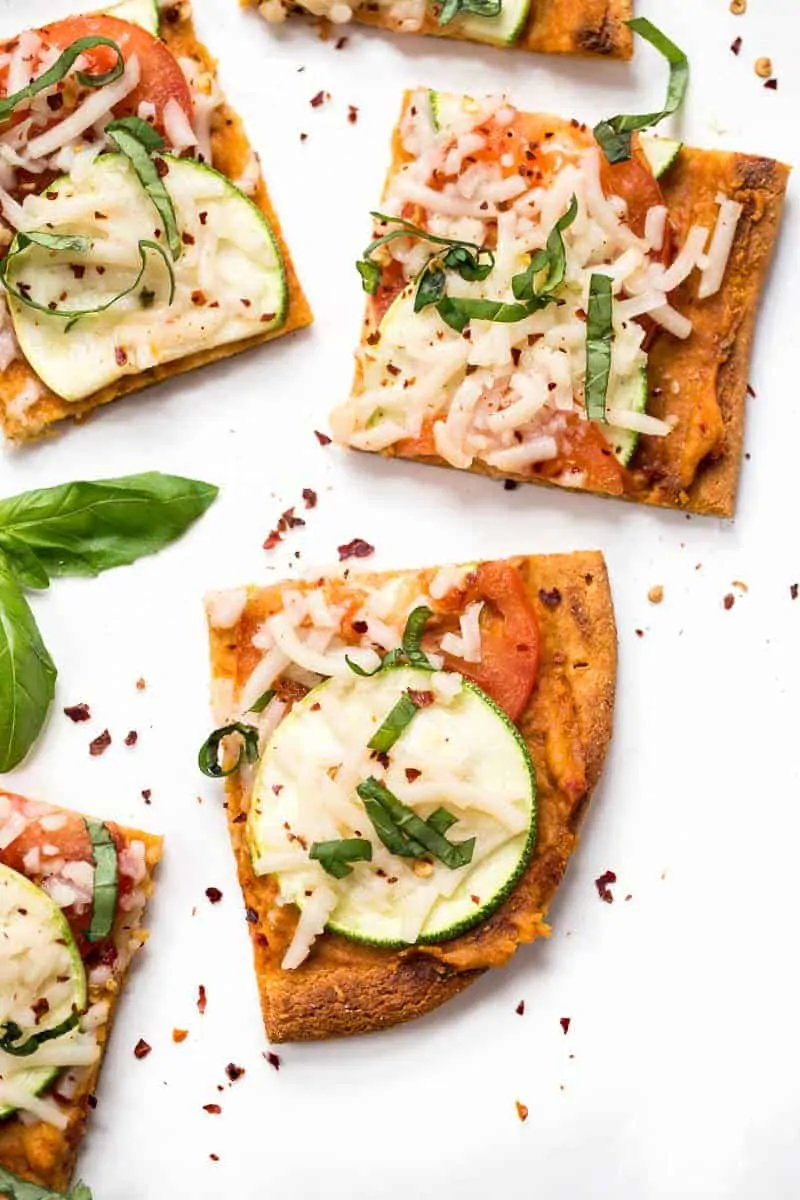
  • Remove and slice into squares. Sprinkle with fresh basil and crushed red pepper and serve.

Continue Reading
No comments
Share:

Lemon Chicken Piccata

                                      Lemon Chicken Piccata

Lemon Chicken Piccata is a budget-friendly take on an Italian classic! Incredibly easy, low carb, and diabetic-friendly, this piccata recipe is one you’ll want to make again and again.

Plate with Lemon Piccata Chicken and side salad.

Chicken piccata was one of the first authentic Italian recipes I ever tried. From the first bite, I was hooked!

Tender chicken breast smothered with a tart lemon-caper butter sauce… ah, heaven.

Chicken piccata (or veal piccata) quickly became my menu item of choice when dining out. Finally, after ordering this dish more times than I can count, I decided to start making it at home.

After tasting so many restaurant versions, I knew I wanted a recipe that was a perfect balance of tart, salty and creamy.

This lemon chicken piccata delivers on all counts! The best part, aside from being much cheaper than the restaurant version, is that this delicious chicken is ridiculously easy to make — even on a weeknight!

How to make lemon chicken piccata

The name “chicken piccata” makes it sound like a complicated and fancy recipe, but it’s actually very easy to make. In fact, everything comes together in one skillet!

Step 1: Slice each chicken breasts in half lengthwise so you get two thin chicken slices from each breast.

Step 2: If necessary, use a mallet or other heavy object to flatten the chicken breasts until they’re about ½ inch (1.25 cm) thick.

Step 3: Dredge the chicken breast slices in just a little bit of flour seasoned with salt and pepper. You don’t want a heavy coat, just a very light dusting.

chicken slices dredged in flour on a plate

Step 4: Heat a large saute pan over medium-high heat and add oil. When the oil is shimmering, add the chicken breast slices to the pan. Cook for 3-4 minutes per side until browned and cooked through. Remove the chicken slices from the pan and set aside.

Step 5: Add the wine to the saute pan, stirring and scraping up the browned bits on the bottom of the pan.

Reducing the sauce in a pan

Step 6: Add the lemon juice and chicken stock. Increase the heat to high and boil until the sauce thickens, about 3 minutes.

Step 7: Reduce the heat to medium and add the butter. Stir in the capers and parsley, then add the chicken back to the pan to rewarm. Taste the sauce and adjust the seasoning.

Doesn’t that look just delicious?

Finished chicken piccata on a plate with lemon wedges and a side salad

Making the perfect sauce

The browned chicken breast will be delicious, but the sauce is really what makes this dish so incredible! So I have a few tips for making the best sauce you possibly can.

If at all possible, use a dry white wine in this dish. It helps to “mellow” out the sharpness of the lemon juice and create a great, balanced flavor profile.

If you prefer to omit the alcohol, you can substitute the same amount of chicken stock. Keep in mind that this will add extra salt, so I would suggest rinsing the capers and omitting the salt from the flour you use to dust the chicken.

Planning to make this recipe for a special occasion, or just looking for something insanely delicious? Whisk a little heavy cream into the sauce just before serving! This takes an already amazing dish to the next level.

What to serve with chicken piccata

This recipe is delicious with just a side salad if you want something simple. The flavors of the chicken are so tasty, you don’t really need much else.

On the other hand, I love having something to soak up the amazing lemon sauce! In that case, I’ll serve the chicken over zucchini noodles or rice. It really depends on how many carbs you want to eat.

If you choose a low carb side, the recipe is also great for anyone following a ketogenic diet. Flour is not a typical keto ingredient, but the amount used here is so minimal, it doesn’t have a high impact on the carbs. You could also substitute for almond flour.

Ingredients

  • 2 skinless, boneless chicken breasts
  • 3 tbsp. unsalted butter
  •  tbsp. all purpose flour
  • ¼ tsp. white pepper
  • ¼ tsp. salt
  • 2 tbsp. olive oil
  •  cup dry white wine
  •  cup low sodium chicken stock
  • ¼ cup lemon juice
  • ¼ cup drained capers
  • ¼ cup Italian Parsley (minced)
  • Salt & pepper

Instructions

  • Slice each chicken breasts in half lengthwise so you get two thin chicken slices from each breast.
  • If necessary, use a mallet or other heavy object to flatten the chicken breasts until they’re about ½ inch (1.25 cm) thick.
  • Dredge the chicken breasts slices in just a little bit of flour seasoned with salt and pepper. You don’t want a heavy coat, just a very light dusting.
  • Heat a large saute pan over medium-high heat and add oil. When the oil is shimmering, add the chicken breast slices to the pan. Cook for 3-4 minutes per side until browned and cooked through. Remove the chicken slices from the pan and set aside.
  • Heat a large saute pan over medium-high heat. When the oil is shimmering, add the chicken breast slices to the pan. Cook for 3 -4 minutes until browned. Turn the chicken slices over and brown on the other side. Remove the chicken slices from the pan and set aside.
  • Add the wine to the saute pan, stirring and scraping up the browned bits on the bottom of the pan.
  • Add the lemon juice and chicken stock. Increase the heat to high and boil until the sauce thickens, about 3 minutes.
  • Reduce the heat to medium and add the butter. Stir in the capers and parsley, then add the chicken back to the pan to rewarm. Taste the sauce and adjust the seasoning.


Continue Reading
No comments
Share:

Thursday, September 2, 2021

Ginger Steak Fried Rice Recipe

Ginger Steak Fried Rice

 Perfect for an end-of-the-week meal, this sensational dish comes together quickly with leftover rice. I learned a great tip for the steak recently: Partially freeze it, and it will be easy to cut into thin slices. 

Ingredients

  • 2 large eggs, lightly beaten
  • 2 teaspoons olive oil
  • 1 beef top sirloin steak (3/4 pound), cut into thin strips
  • 4 tablespoons reduced-sodium soy sauce, divided
  • 1 package (12 ounces) broccoli coleslaw mix
  • 1 cup frozen peas
  • 2 tablespoons grated fresh gingerroot
  • 3 garlic cloves, minced
  • 2 cups cooked brown rice
  • 4 green onions, sliced


Directions

  • In a large nonstick skillet coated with cooking spray, cook and stir eggs over medium heat until no liquid egg remains, breaking up eggs into small pieces. Remove from pan; wipe skillet clean if necessary.
  • In same pan, heat oil over medium-high heat. Add beef; stir-fry
  • 1-2 minutes or until no longer pink. Stir in 1 tablespoon soy sauce; remove from pan.
  • Add coleslaw mix, peas, ginger and garlic to the pan; cook and stir until coleslaw mix is crisp-tender. Add rice and remaining soy sauce, tossing to combine rice with vegetable mixture; heat through. Stir in cooked eggs, beef and green onions; heat through.
Nutrition Facts
1-1/2 cups: 346 calories, 9 g fat (3 g saturated fat), 140 mg cholesterol, 732 mg sodium, 36 g carbohydrate (5 g sugars, 6 g fiber), 29 g protein. Diabetic Exchanges: 3 lean meat, 2 starch, 1 vegetable, 1/2 fat.

Continue Reading
No comments
Share:

Pulled Chicken Sandwiches Recipe

 Pulled Chicken Sandwiches

Dinner guests are guaranteed to be impressed with this deceptively easy Pulled Chicken Sandwich recipe, which includes a seven-ingredient rub and a simple 15-minute sauce that comes together while the chicken grills. Serve on buns, over fresh greens, or on top of a baked potato for a filling dinner.

Gallery

Ingredients

  • 1 medium onion, finely chopped
  • 1 can (6 ounces) tomato paste
  • 1/4 cup reduced-sodium chicken broth
  • 2 tablespoons brown sugar
  • 1 tablespoon cider vinegar
  • 1 tablespoon yellow mustard
  • 1 tablespoon Worcestershire sauce
  • 2 garlic cloves, minced
  • 2 teaspoons chili powder
  • 3/4 teaspoon salt
  • 1/8 teaspoon cayenne pepper
  • 1-1/2 pounds boneless skinless chicken breasts
  • 6 whole wheat hamburger buns, spli

Directions

  • In a small bowl, mix the first 11 ingredients. Place chicken in a 3-qt. slow cooker. Pour sauce over top.
  • Cook, covered, on low until chicken is tender, 4-5 hours. Remove chicken; cool slightly. Shred meat with 2 forks. Return to slow cooker; heat through. Serve on buns.
    Freeze optionFreeze cooled chicken mixture in freezer containers. To use, partially thaw in refrigerator overnight. Heat through in a saucepan, stirring occasionally; add a little broth if necessary.
Nutrition Facts
1 sandwich: 296 calories, 5g fat (1g saturated fat), 63mg cholesterol, 698mg sodium, 35g carbohydrate (12g sugars, 5g fiber), 29g protein. Diabetic Exchanges3 lean meat, 2 starch.

Continue Reading
No comments
Share: